Using Interactive Notebooks to Teach Science
- August 3, 2016
- By Mari Venturino
In this post, seventh-grade teacher Mari Venturino talks about how to use an interactive notebook to keep track of engaging and creative science lessons throughout the year.

As many educators move towards one-to-one technology classrooms, we need to keep what is best for students in the forefront of our minds. Sometimes, an analog model works best for learning, and we must set aside the devices for a while. In my seventh grade science classroom, I do just that with our interactive science notebooks. In this exercise, I’ll lay out the process of using interactive science notebooks in class.
I follow a fairly strict interactive notebook format, where the right side page is the “input” exercise and the left side page is the “output” exercise. This method is based on brain lateralization, where the left side of the brain focuses on being analytical, and the right side of the brain focuses on creativity (remember, each side of our brain controls the opposite side of the body). During each science lesson, my class begins with the right side “input” page then the left side “output”; this takes a while for students to get the hang of, but eventually it becomes routine. (I’ll describe the difference between these exercises shortly.)
We set up our notebooks together in the first two weeks of school, once schedules are settled and students are comfortable in my class. I require students to have a single subject 8.5” x 11” or 9” x 11” notebook, which is enough for our entire school year. On notebook setup day, we number each page front and back starting with the first right side page as page one. It is extremely important that students number their pages correctly– this saves a lot of trouble and stress for both the student and the teacher later on.
Then, I provide students with handouts and a list of what will go in their notebook. This includes general information about our class, bathroom passes (I give them six per semester, and I do not offer extra credit for leftover bathroom passes), templates for writing claim-evidence-reasoning in science, and a summary of notebook expectations.
I have created some interactive science notebook templates. Feel free to customize to meet your needs.
Each unit starts the same way: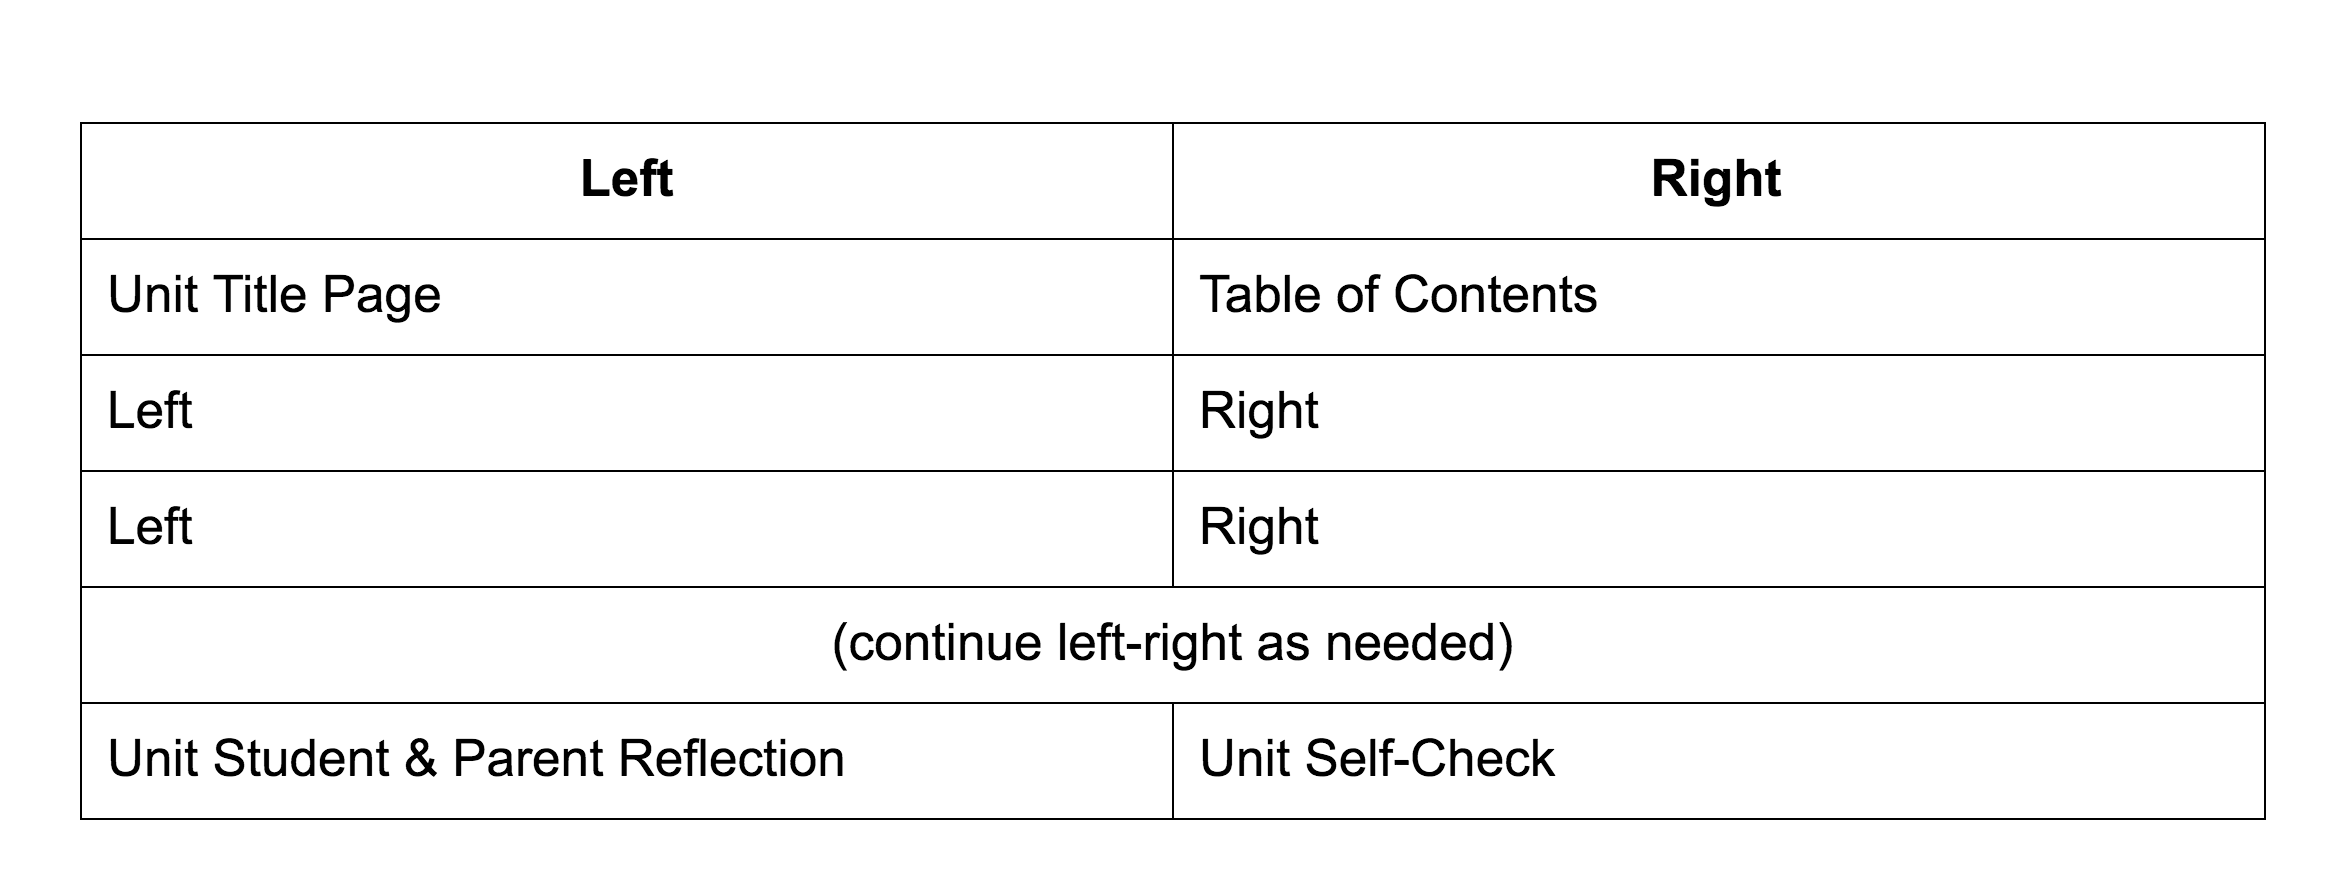
At the end of each unit, students complete their unit title page, self-check, individual reflection, and parent reflection. This allows them to identify their best work, areas of growth, and progress they’d like to make. We check notebooks in class with trade-and-grade, which saves me time. I’m always walking around to double check grading, and I randomly spot check notebooks in each class.
In our science class, we are on a 100 minute block schedule. I almost always follow the same class format: warm-up, right side input, left side output, activity, closure. The routine helps students know exactly what to expect each day, and there is plenty of room for creativity and excitement.
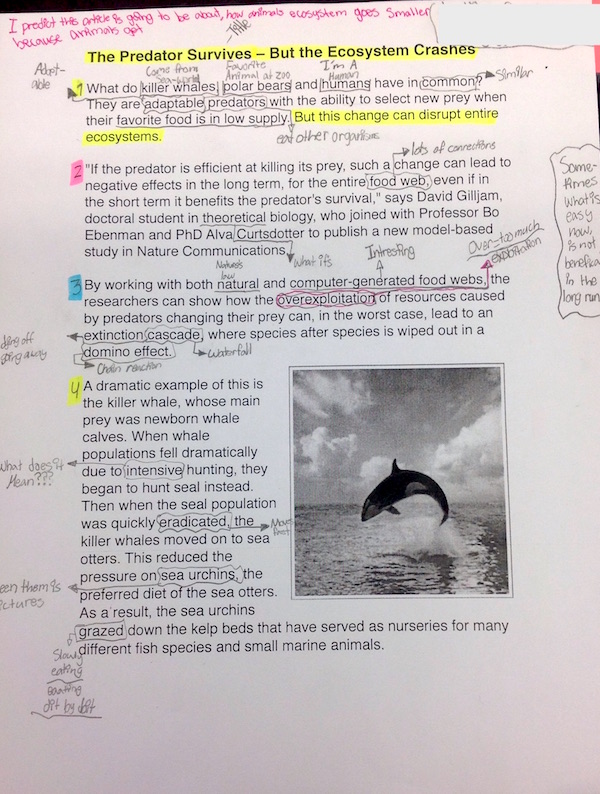
Our right side “input” pages can be information from direct instruction, short flipped video lessons completed for homework, videos (Bill Nye and Magic School Bus are our favorites), or station work. My class uses the Cornell Note system to record notes. I provide my students with cloze Cornell Notes to make the input part as quick as possible. Slowly throughout the year, as they learn to write faster and more efficiently, I have them take on more and more of the note-taking process.
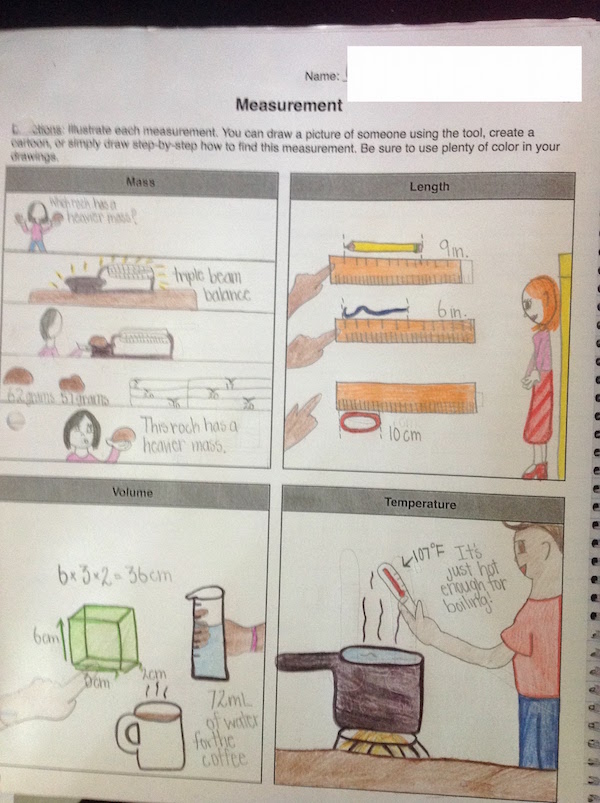
After we’ve completed the right side together, I provide instructions for students to complete the left side “output” pages of their notebook. This is always a creative activity that includes plenty of color and open-ended prompts. Activities include: quick-writes and quick-draws, creating cartoons, T-charts and Venn diagrams, and labeled diagrams.
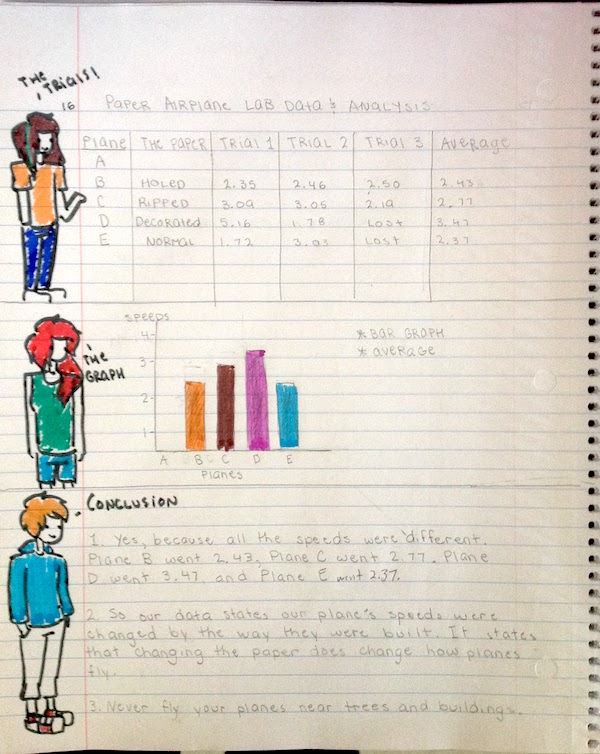
With the except of a video, the right side page typically takes no more than ten to fifteen minutes. We usually allow for twenty to thirty minutes for the left side page, and occasionally longer for a more detailed assignment. The entire right-left cycle can be completed in under an hour, including a warm-up and organizing notebooks for the day. This leaves the last hour for the activity, which may be a lab, game, station work, or project that directly implements what was learned in the right-left cycle (or a few right-left cycles). With labs in science, it is easy to adjust lab handouts into a right (procedures and pre-work) and left (data and analysis) format.
Below are some examples of input and output pages some of my students have completed. My students absolutely love their science notebooks, and always smile at the end of the year when they flip back through to see how much they’ve grown. This year, I am lucky that my whole department is on board with interactive notebooks in science!

Using Interactive Notebooks to Teach Science | Mari Venturino